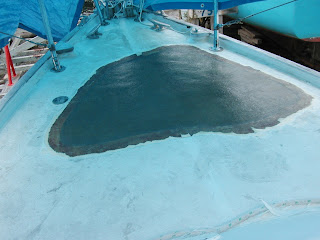
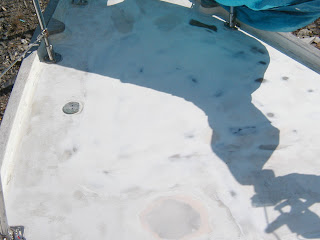
The first thing we had to do was clear our deck - remove our windlass, and the hawse pipes that the anchor chains ran though - and remove the plate under the deck we had used to spread the load. The windlass needs repairs, so we would have had to take it off anyway and this was an opportunity to rethink how we had installed it in the first place. Among our concerns was finding a good way to strengthen the area and spread the loads of hauling up a reluctant anchor better. So we started the work on the deck - once again Richard did the fibreglass layups, and then I did the sanding and detailing.
The first thing that Richard did was cut the top layer of the deck where he knew repairs were needed. To start with he cut the top of the deck a little bit beyond the edge of all cracked areas. If he did not find dry balsa around the area that he had cut he cut back some more. We had hoped the top layer would come off in one piece, and keep it’s shape - but a combination of wet and dry balsa beneath it foiled that plan. The old deck continued to adhere to the small areas of dry balsa, so it had to be removed in bits and pieces. Once the top layer was off, he took out all the balsa out of the areas that were wet, and began the repair.

Since we wanted this area of the deck to be strong, he rebuilt the deck area without using a core. Instead he used two fibreglass layups, one to replace the core and one to replace the upper part of the deck.
He did the first layup on top of bottom layer of the deck, where the core would have been. First he put catalyzed resin on the top of the inside deck layer with a roller. On top of this he used 7 layers of mat and one layer of roving altogether - 2 layers of mat, one of roving, then the rest of the mat layers - to make a layer about a quarter inch thick. To do this he applied resin to each layer before the next one was put on and rolled the air out after all the layers were in place.

He also put three or four layers of mat and resin inside the boat, underneath the deck area where the windlass will be remounted, replacing the plate we had used to give the mounting area extra strength. Laying up above your head can be tricky - he put first layer up on a resin wet surface, but not as wet as if he were laying up on a surface that was below him - with small pieces the resin is sticky enough to keep them in place. If you are doing a larger area and have trouble getting the first piece to stick, you let it get tacky - but here the pieces were small enough not to create a problem - less than a foot square. Again, he put all the layers up and then rolled them out.
Once those were in place he began the top layer of the deck. To start with he taper ground all the edges of the remaining top deck layer, using a grinder. He took the taper about three inches out from the area being repaired.

As with the previous layer, he started with a layer of resin on the surface below. Then he laid up the top layer using mat and resin (no roving). He used four layers of mat, each one slightly bigger than the previous one, to compensate for the taper. He put the layers on, one after another, while they were still wet, and rolled out the bubbles after they were all on.

Then came my part of the work - the sanding. I used our trusty random orbital sander for most of the job, the small mouse sander to sneak into place that the bigger sander could not go, and a small hand sander for even tighter areas. After the first sanding, we filled the pinholes. Then I did more sanding, and some shaping to make sure that the deck contour looked right. Then there was more filling and more sanding. After that we rolled on the first layer of gelcoat - since it is more water resistant than just resin it provided some protection, and it was easier to see the contours of the deck with everything the same color.

That was sanded as well. Then, after another layer of gelcoat and more sanding, Richard rolled on the final layer of gelcoat. This time he added Air Dry, which is used to make this a hard, waterproof and sunlight resistant coating. Air Dry should only be added to the final coat, as new gelcoat will not stick to it unless it is sanded well.


We removed the smooth central ‘channel” that ran through the nonskid, and I reshaped the other channels around the area where necessary and sanded the whole foredeck so it was ready for painting with non-skid. Once that was done, we taped the nonskid area.

Finally we put on three coats of the non-skid paint we had chosen (Skid-No-More). This is picture of the first coat. Note to selves - we would have used less if we’d read the directions first!

The final coat of non-skid is now on. The windlass is being repaired. We'll post the final picture when it's all done.
What gorgeous photos! You have a rare talent. Beautiful work.
ReplyDeleteClick For More Information : Deck Repairs